So, you’re interested in trying Linux on your machine? Maybe, you’ve already installed a Linux distribution, but you find yourself constantly breaking things and nearly throwing your keyboard/laptop out a window. If Linux is a new adventure for you, it can sometimes be frustrating and intimidating. This is perfectly normal and expected with anything you haven’t tried before. My goal in this post is to help new (or seasoned) Linux users build a safe place to learn and experiment without the intimidation and fear of rendering their daily operating system unusable.
Introduction
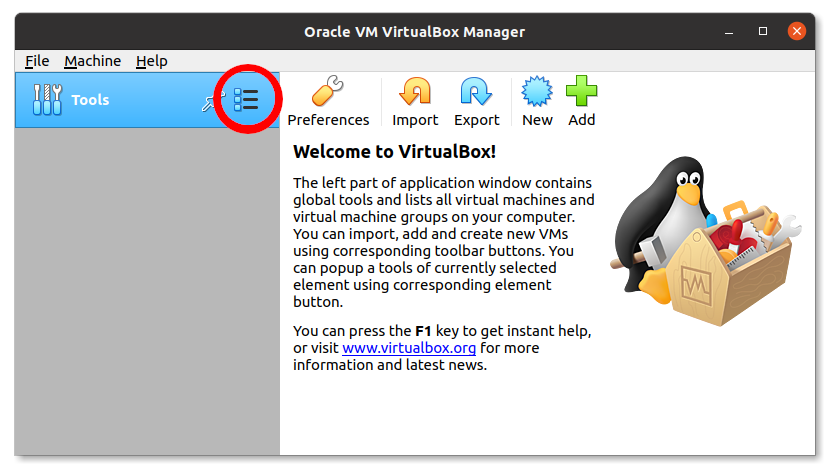
Virtual machines are GUEST operating systems, which run within a HOST operating system. These machines can be useful for testing software for various operating systems, as well as for maintaining a “sandboxed” operating system which can be easily backed up and restored to a known working configuration. VirtualBox is an application which allows users to create and manage multiple virtual machines.
In order to run VirtualBox on your machine, you need :
- Reasonably powerful x86 hardware. Any recent Intel or AMD processor should do.
- Memory. Depending on what guest operating systems you want to run, you will need at least 512 MB of RAM (but probably more, and the more the better). Basically, you will need whatever your host operating system needs to run comfortably, plus the amount that the guest operating system needs. So, if you want to run Windows 8.1 on Windows 7, you probably won’t enjoy the experience much with less than 2 GB of RAM. Check the minimum RAM requirements of the guest operating system, they often will refuse to install if it is given less. Sometimes it malfunctions instead. So you’ll need that for the guest alone, plus the memory your operating system normally needs.
- Hard disk space. While VirtualBox itself is very lean (a typical installation will only need about 30 MB of hard disk space), the virtual machines will require fairly huge files on disk to represent their own hard disk storage. So, to install Windows 8, for example, you will need a file that will easily grow to several 10 GB in size.
Note : This guide assumes you have already installed Linux (specifically, Ubuntu 22.04, Ubuntu 20.04, or their Linux Mint counterparts) on your HOST system. If you are coming from Windows, consider installing Linux on a fresh hard drive. While you can “dual-boot”, I don’t recommend it for beginners. Solid state drives are cheap these days. I have had great results with the Kingston A400 drives (Affiliate link). If you need some help installing Linux as an operating system on your “bare-metal” machine, give my post Installing Linux a read.
Install VirtualBox
If you are wanting to try this from a Windows or Mac (Intel) HOST, you can download the VirtualBox installer for those operating systems here :
VirtualBox 6.1 for Windows (~105MB)
VirtualBox 6.1 for Mac (~120MB)
On a Linux HOST system, you’ll need to install the required VirtualBox packages :
Required packages :
virtualbox
virtualbox-guest-additions-iso
virtualbox-dkms
virtualbox-ext-pack
sudo apt install virtualbox virtualbox-guest-additions-iso virtualbox-dkms virtualbox-ext-pack
Note : You will need to accept the license agreement in order to complete the install.
User Management (HOST)
On a Linux HOST system, you’ll need to add your user to the vboxusers group.
sudo usermod --append --groups vboxusers yourusernamehere
Note : For this change to take effect, you will need to logout/login.
Download ISO for the GUEST
On the HOST system, download the ISO for the operating system to be installed as a GUEST system. I strongly recommend having a GUEST system with the same operating system as your HOST system, as this will allow you to test things in a safe way before replicating those changes on your HOST system. But, you can also create virtual machines of other operating systems to test for compatibility, or just for the fun of it!
Suggested ISO Download Links :
Direct:
Ubuntu 22.04 – https://releases.ubuntu.com/22.04.1/ubuntu-22.04.1-desktop-amd64.iso
Linux Mint 21 – https://mirrors.kernel.org/linuxmint/stable/21.1/linuxmint-21.1-cinnamon-64bit.iso
Ubuntu 20.04 – https://releases.ubuntu.com/20.04.5/ubuntu-20.04.5-desktop-amd64.iso
Linux Mint 20 – https://mirrors.kernel.org/linuxmint/stable/20.3/linuxmint-20.3-cinnamon-64bit.iso
Torrent:
Ubuntu 22.04 – https://releases.ubuntu.com/22.04/ubuntu-22.04.1-desktop-amd64.iso.torrent
Linux Mint 21 – https://linuxmint.com/torrents/linuxmint-21.1-cinnamon-64bit.iso.torrent
Ubuntu 20.04 – https://releases.ubuntu.com/20.04/ubuntu-20.04.5-desktop-amd64.iso.torrent
Linux Mint 20 – https://linuxmint.com/torrents/linuxmint-20.3-cinnamon-64bit.iso.torrent
Create Virtual Machine
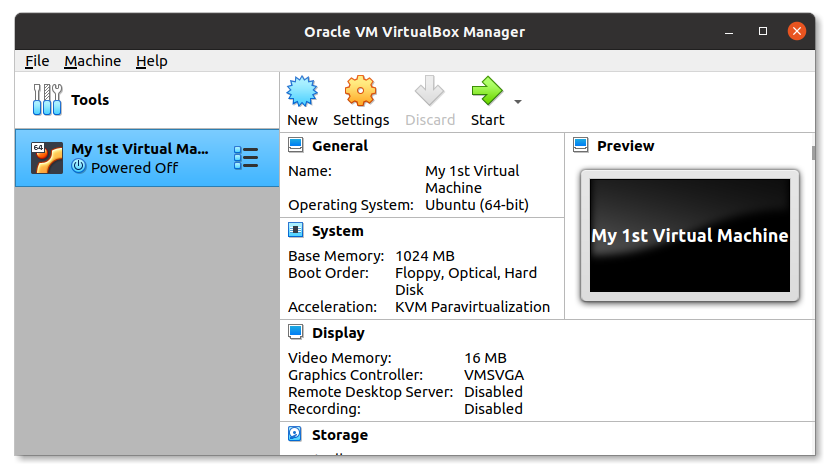
With VirtualBox now installed, and an ISO downloaded, it’s time to create your GUEST virtual machine. In this section, you’ll decide on the specifications for the virtual machine on which the GUEST system will be running. First, you need to tell VirtualBox some basic details, like the name of the new virtual machine, where its files should be stored, and what type of operating system the GUEST will be.

- On the HOST system, open VirtualBox, and select New.
- Give the GUEST system an appropriate name.
- Optionally, define the location of the Machine Folder, where the VM files will be stored (the default is “VirtualBox VMs” in your home folder).
- Select the Type of Linux
- Select the Version of Ubuntu (64-bit)
- Select Next.
Next, you’ll need to specify the virtual machine’s “hardware.” This will include the amount of memory, the hard disk size, and the number of processors.
— MEMORY–
- Allocate an appropriate amount of memory to the GUEST machine (minimum of 2GB).
- Select Next.
— HARD DRIVE —
- Select Create a virtual hard disk now.
- Select Create.
- Select VDI (VirtualBox Disk Image).
- Select Next.
- Select Dynamically allocated.
- Select Next.
- Allocate an appropriate MAXIMUM size for the GUEST machine hard disk (recommended minimum of 20GB).
- Select Create.
— PROCESSOR —
- With the GUEST system highlighted, select Settings.
- From the System section, select the Processor tab, and allocate an appropriate number of CPU(s) to the GUEST system. (One is fine, though)
Finally, you’ll need to “insert” the install media (the ISO you downloaded) into the virtual machine’s CD/DVD drive.
- From the Storage section, select the Empty optical drive under Controller: IDE.
- From the Attributes > Optical Drive section, select Choose a disk file… from the optical disk dropdown menu.
- Browse to and select the ISO you downloaded earlier.
- Select OK.
Start Virtual Machine
With the GUEST system’s virtual hardware configured, it’s time to install the GUEST operating system.

- With the GUEST system highlighted, select Start.
- Complete the installation of the operating system by following the prompts from the installer.
- Once the installation is complete, power off the GUEST system.
Note : Some installers prompt for a reboot when they complete. That’s fine. Once it reboots, just power it off through the new GUEST operating system.
Create Snapshot
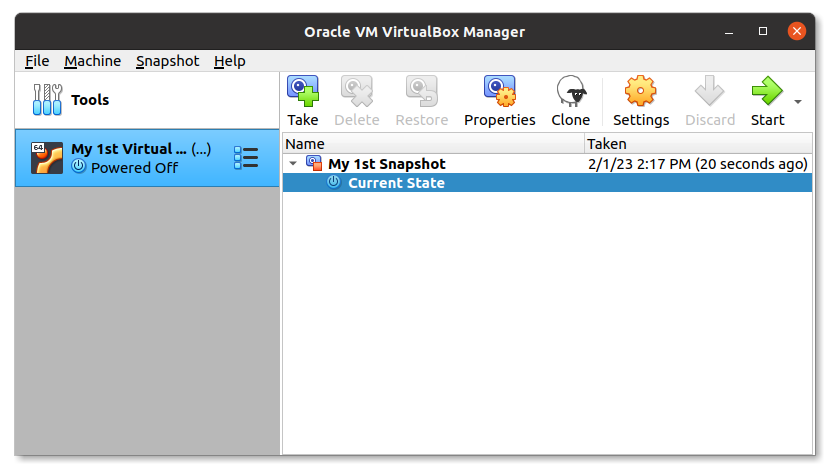
Now that you have a freshly installed GUEST operating system, you should take a snapshot. This snapshot will allow you to restore the GUEST system to this “known good” state at any time. After any major changes you make have been tested and are known to work, it’s a good idea to take a snapshot.

- With the GUEST system highlighted, select Take.
- Give the snapshot an appropriate name (e.g. Fresh Install).
Note : Snapshots include the GUEST operating system state, as well as the machine settings for the GUEST (memory, processor, disks, etc.). They are incremental. Meaning, they only include the changes in order to save disk space. Take a snapshot any time you want to ensure the ability to restore to a particular state. A new snapshot does not overwrite an old one.
— OPTIONAL —
Install Guest Additions
Guest Additions for VirtualBox is required to enable some features. Shared Folders is a feature that allows you to specify a folder on your HOST system to be shared with the GUEST system. This can be handy for keeping files generated on the GUEST system safe from being lost if the GUEST system is reverted to a previous snapshot. USB Passthrough is a feature that allows for a USB device connected to the HOST system to be used by the GUEST system.
Start the GUEST system, and install the required packages :
Note : On Linux Mint guests, these packages are usually installed by default. So, this step may not be necessary.
Required packages :
gcc
make
perl
sudo apt install gcc make perl
Next, you need to “insert” the Guest Additions install CD into the GUEST system’s CD/DVD drive.
- From the top toolbar of the virtual machine’s window, under Devices, select Insert Guest Additions CD Image…
- Select Run, when prompted.
- When the installation is completed, reboot the GUEST system.
User Management (GUEST)
- On the GUEST system, to add the ability to use Shared Folders add your user to the vboxsf group.
- On the GUEST system, to add the ability to use USB Passthrough, you may need to add your user to the dialout group. This applies if you want to use USB devices like modems, serial adapters, and TNCs.
sudo usermod --append --groups vboxsf yourusernamehere
sudo usermod --append --groups dialout yourusernamehere
Note : For this change to take effect, you will need to logout/login.
- Power off the GUEST system.
Setup Shared Folders
- With the GUEST system highlighted, select Settings.
- In the Shared Folders section, select the Folder path (path to the folder on the HOST system).
- Select the Auto-mount option.
- Select the Mount point (path to mount the folder to on the GUEST system).
Setup USB Passthrough
- Connect the USB device to the HOST system.
- With the GUEST system highlighted, select Settings.
- In the USB section, select the Enable USB Controller option.
- Select the USB 2.0 option.
- Select the icon of a USB drive with a “plus sign”, then select the desired USB device from the dropdown menu.
Guest Additions Bonus Features
Guest Additions brings a couple more fun features with it. The first is the ability to run the GUEST system as a full-screen, making it feel as though you aren’t even in a virtual machine. The default way to toggle between windowed mode and full-screen is to use the Right CTRL key + F. Along those same lines, if you happen to have a dual monitor setup, Guest Additions allows you to add a second display to the GUEST system (in the Display section of the GUEST machine’s settings), and utilize it as well for a fully “immersive” virtual experience.
Test, Test, Test!
If all has gone well, it’s time to TEST ALL THE THINGS! Boot up your new GUEST system and do some stupid things in it. Then, test your ability to restore from a known good snapshot. You took a snapshot, right? Make sure the Shared Folder is usable by both the HOST system and the GUEST system. Verify that you can pass a USB device from the HOST system to the GUEST system. In the GUEST system, you can issue this command to show the USB devices connected to the system:
lsusb
*** TAKE A SNAPSHOT OF THE GUEST SYSTEM FOLLOWING ANY IMPORTANT CHANGES ***
Go forth and learn without fear of bricking your daily OS. You did take a snapshot, didn’t you?
73 de KG4VDK
If you found this post helpful, and would like to join me in more of these sort of technology adventures, let me know with a comment. If you’re feeling really generous, consider buying me a coffee or beer. 🙂


