Many of us take internet access for granted. Being a few keystrokes away from answering any question has become the norm. However, there are times when even the most reliable connections go down. There are also times when we intentionally venture beyond the bounds of civilization. For those times when the internet isn’t reachable, voluntarily or involuntarily, having knowledge available locally can be extremely valuable.
Introduction
Kiwix is a free and open-source project built around the idea that people all over the world should be able to access information even without internet access. The project provides several pre-packaged files (ZIM format), which are compressed content from various websites (or portions of websites). For example, ALL of Wikipedia can be made locally available to you for offline access with only ~95GB of disk space required. Don’t need the pictures? Cut the size in half. Just want the intro blurb for the articles and no pictures? Now you’ll only need ~15GB. They also provide ZIM files for several StackExchange communities. If you’ve ever searched for an answer to a technical problem, you’ve likely stumbled onto the right answer with a green check mark next to it on StackExchange.
In addition to providing this content in a ready to use package, the Kiwix project also provides the software needed to share the content from your device with any other device on your same LOCAL network. Remember, this is still usable in the event of an outage.
By the end of this post, you’ll be able to share the content of your choice with anyone on your local network with access to a web browser – no internet required.
Note : This post assumes you are using Ubuntu 22.04, Ubuntu 20.04, or their Linux Mint counterparts.
Download ZIM File(s)
To find the content you’d like to serve, browse through the library of available ZIM files. Here’s a few I’d recommend checking out :
- ALL of Wikipedia (~95GB)
- ALL of Wikipedia w/o Pictures (~50GB)
- Ham Radio StackExchange (~65MB)
- Raspberry Pi StackExchange (~310MB)
- Post Disaster Resource Library (~800MB)
For the sake of your internet bandwidth, and the purposes of demonstration, let’s use this one : Ray Charles’ page on Wikipedia (~2MB)
Note : The Wikipedia ZIM files are updated roughly every 6 months. You just replace the older one with a newer one, if you decide to update yours.
Download Kiwix Tools
With your desired, or demo, ZIM file(s) downloaded, you now need to download the tools for serving the content. The Kiwix project provides “kiwix-tools” for this purpose.
Create Kiwix Directory
At this point, you need to make a choice. If you have enough disk space on your machine, you can keep your Kiwix files in your user’s home directory. If you’d rather not take up your hard drive space with the Kiwix files, you can keep them on a USB drive of sufficient size. I’ve had great results with the Samsung Bar USB Drive (Affiliate link). It’s a USB 3.0 drive and it has a metal housing with a solid keyring loop. It’s fast, rugged, and hard to lose.
Your ZIM file(s) and kiwix-tools need to be placed in a directory (that’s a “folder” for you Windows converts). I like to keep mine in my home directory, located at :
/home/username/Kiwix
You can create the directory with the file browser, or in a terminal with the following command :
mkdir /home/username/Kiwix <-- For Kiwix in user's home
mkdir /media/username/drive_label/Kiwix <-- For Kiwix on USB drive
Note : From this point forward, I will be showing the steps for Kiwix being located in the user’s home directory. For USB installs, make careful note of the file paths.
Within the Kiwix directory, create a directory called “zim” :
mkdir /home/username/Kiwix/zim
With the directory for your ZIM file(s) created, go ahead and move the ones you downloaded into this “zim” directory. You can drag and drop in a file browser, or you can use this command in a terminal :
mv /path/to/the/zim/file/you/downloaded.zim /home/username/Kiwix/zim/
Extract Kiwix-Tools
The kiwix-tools file you downloaded earlier is in “tarball” format. A “tar” file is an archive file type which stands for “tape archive.” The “.gz” file extension means it has been compressed using the “gzip” compression algorithm. You will need to extract the files from the compressed archive.
- Move the kiwix-tools_blah-blah-blah.tar.gz file to your “Kiwix” directory.
- Extract the archive in the “Kiwix” directory in a file browser by right-clicking on the archive and selecting “Extract here.” Or, decompress the archive in a terminal by issuing these commands :
cd /home/username/Kiwix
tar -xvzf kiwix-tools_blah-blah-blah.tar.gz
Note : The “blah-blah-blah” portion of the filename is not real. It’s where the version number and architecture is in the “real” filename. Use your common sense to change it to the version you have downloaded.
Test Kiwix Server
ZIM files – check! Kiwix-Tools – check! Let’s make sure it works!
You’ll need to use the terminal, and change into your kiwix-tools directory :
cd /home/username/Kiwix/kiwix-tools_blah-blah-blah
To start the Kiwix Server, you’ll use the `kiwix-serve` command, specifying the network port to serve the content over, as well as the directory where your ZIM files are located. The “./” at the beginning of the line means that the command is in the current directory. You could also specify the full path to the `kiwix-serve` command. The asterisk at the end of the line is a path wildcard. It means that any file in the directory should be served :
./kiwix-serve --port 1234 /home/username/Kiwix/zim/*
You should get a response in the terminal like this :
The Kiwix server is running and can be accessed in the local network at: http://192.168.0.XXX:1234
On you machine, test the server by opening a web browser and going to :
http://localhost:1234
If you want to test from another device on your local network, you can point your browser on that device to the IP address and port specified in the message above. Something like :
http://192.168.0.XXX:1234
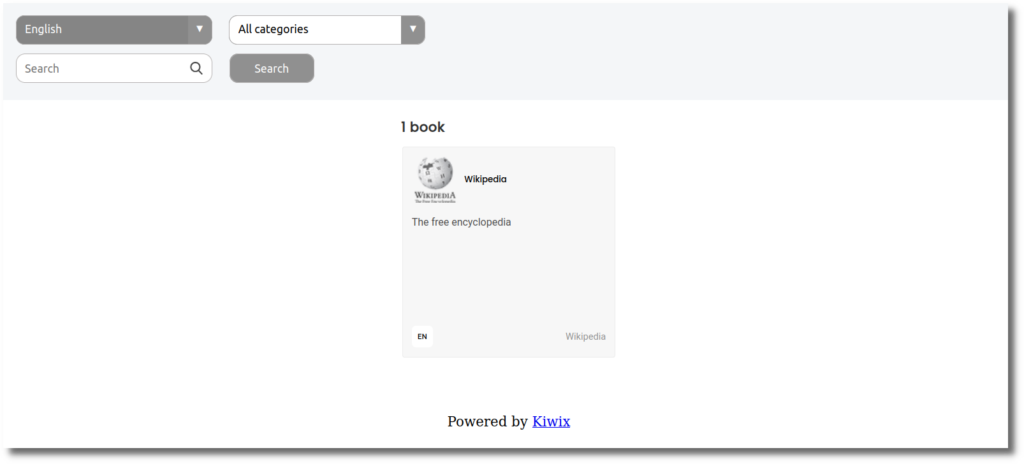
If you are seeing something like the below images, your Kiwix Server is working. Great!


Browse around for a bit and check it out if you want. When you’re ready to proceed, let’s stop the server so we can configure it to start automatically. To stop the Kiwix Server, you can press CTRL+C in the terminal window where it is running.
For more details about how you can use this tool, please reference the Kiwix-Server Manual.
Create Script to Start Kiwix Server
To automate the process of starting the Kiwix Server, you’ll need a script. A script is just a file containing a collection of commands to be executed. At the very least, a script needs to be executable, contain a reference to the desired interpreter, and contain at least one command. Here’s an example of a very simple script to print the phrase “Hello World” in a terminal :
#!/bin/bash
echo "Hello World"
The “#!/bin/bash” line is defining the “Bash” shell as the interpreter for the script. And, the “echo” command will print the specified text.
- In the .kiwix directory, create a file named “start-kiwix”. Place the two lines from the example script in the file and save it.
- Make the script executable by issuing the following command in a terminal :
chmod +x /home/username/Kiwix/start-kiwix
Test the script by running it, like this :
user@host:~$ /home/username/Kiwix/start-kiwix
Hello World <-- This should print to your screen
If the “Hello World” text was printed to your screen, then the basic script is executable and working. Let’s get rid of the “echo” line, and start adding the commands for running Kiwix. This script may look complicated, and I STRONGLY recommend that you read through it and try to understand as much of it as you can before you start using it. I have documented as much as I can in what I provide here, but ultimately you are responsible for what you run on your system.
The Script
*** IMPORTANT *** : You MUST change some of the variables here. All installs will need to edit the KIWIXTOOLS variable to contain the path. For USB installs, you will need to edit the USBKIWIX variable to contain your USB path.
#!/bin/bash

# Check if the "Kiwix" directory exists in user's home directory or on USB.
HOMEKIWIX="$HOME/Kiwix"
USBKIWIX="/media/username/DRIVE_LABEL/Kiwix
if [ -d "$HOMEKIWIX" ]; then
KIWIXDIR="$HOMEKIWIX"
elif [ -d "$USBKIWIX" ]; then
KIWIXDIR="$USBKIWIX"
else
echo "No Kiwix directory found."
fi

# Define the path to the kiwix-tools directory as a variable.
KIWIXTOOLS="$KIWIXDIR/kiwix-tools_blah-blah-blah"

# Define the port to serve content over.
PORT=1234
ZIM="$KIWIXDIR/zim"

# Check if kiwix-serve is already running. If so, kill it.
if pidof kiwix-serve > /dev/null 2>&1; then
echo -n "Killing current kiwix-serve process..."
kill $(pidof kiwix-serve) > /dev/null 2>&1
echo "SUCCESS"
fi

# Start kiwix-serve, and report success/failure to the user.
echo -n "Starting kiwix-serve on port $PORT..."
if "$KIWIXTOOLS"/kiwix-serve -d -p $PORT "$ZIM"/*; then
echo "SUCCESS"
sleep 3
echo "KIWIX PID: $(pidof kiwix-serve)"
echo
echo "Kiwix can be accessed by browsing to http://localhost:1234"
echo "IP Address(es) of this machine: $(hostname -I)"
else
echo "FAILED"
fi
exit 0
Set Kiwix Server to Start at Login
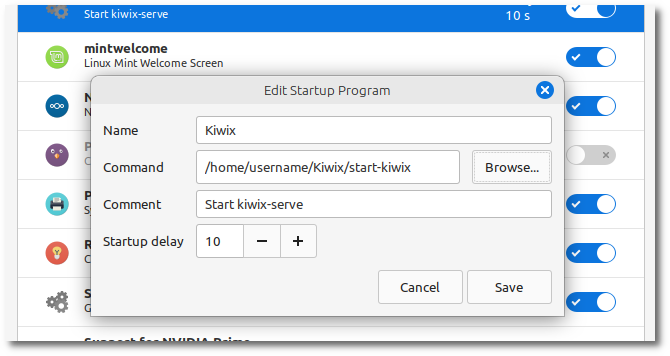
If you’ve got the script working, you can now set Kiwix up to start when you login to your machine. In both Ubuntu and Linux Mint, you can open the “Startup Applications” configuration tool. Add a new entry, and configure it to point to your “start-kiwix” script. I add a 10 second delay to startup, in an attempt to avoid conflicts with other autostart applications.

Test
With autostart configured, test the configuration by logging out or rebooting. When you log back in, verify that the Kiwix content is available at the expected localhost or IP based location.
73 de KG4VDK
If you found this post helpful, and would like to join me in more of these sort of technology adventures, let me know with a comment. If you’re feeling really generous, consider buying me a coffee or beer. 🙂


I am running Linux Mint 21.2. I spent a bunch of time downloading Kiwix and the a bunch of content.
Now I am wanting to clear up my hard drive. When I uninstall, it appears that there is still a lot of data on my hard drive. But I can’t seem to find it. Could you please tell me where the data files that I downloaded are located so that I can remove them.